How to compress a video without losing quality (free, on Windows)
Compress large videos without losing quality on Windows — free and fully offline, no uploads, caps or watermarks. A step-by-step guide using VideoForge, plus how to hit an exact file-size target.

You've finished a video, gone to send or upload it, and hit a wall: the file is too big. Maybe it won't attach to an email, it's over a chat app's limit, or it's going to take forever to upload. The usual fix is an online compressor — but those upload your whole video to a server, often cap the file size, slap on a watermark, or make you wait in a queue. And a lot of them shrink the file by quietly wrecking the quality.
There's a better way on Windows. VideoForge is a free desktop app that compresses video locally — your file never leaves your computer — and its default mode is built specifically to cut file size while keeping the picture looking the same. This guide walks through it step by step, including how to hit an exact size target when you need one.
What you'll need
- A Windows PC
- The free VideoForge app (download it here)
- A video in MP4, MOV, MKV, AVI, WebM or FLV
The compressor is completely free to use. One note on first launch: VideoForge downloads its video engine once (about 80 MB), and after that it runs fully offline — no internet needed, no uploads, ever.
Why you can compress without losing quality
Most "quality loss" from compression comes from tools that target a fixed, low file size and throw away whatever detail they have to. VideoForge's default Quality mode works the opposite way: you choose a quality level, and it makes the file as small as it can while holding that quality constant. Same resolution, same footage — just encoded far more efficiently. In practice that's typically a 40–70% smaller file with no visible difference on screen.
Step 1 — Open VideoForge and pick Compress
Launch the app and choose Compress from the sidebar (it's one of the free tools, alongside Trim, Convert and Video to GIF).

Step 2 — Load your video
Click Select a video file and choose your clip. VideoForge accepts MP4, MOV, MKV, AVI, WebM and FLV. Once it's loaded, the info panel shows its details (resolution, duration, codec, size) so you know what you're starting from.
Step 3 — Choose your quality
Make sure Mode is set to Quality, then pick a level:
- High — visually lossless; the safest choice when quality matters most
- Medium — the sweet spot for most uploads: noticeably smaller, still crisp
- Low — smallest file, fine for quick previews or low-stakes sharing
- Custom — exposes a CRF slider for fine control (lower number = higher quality)
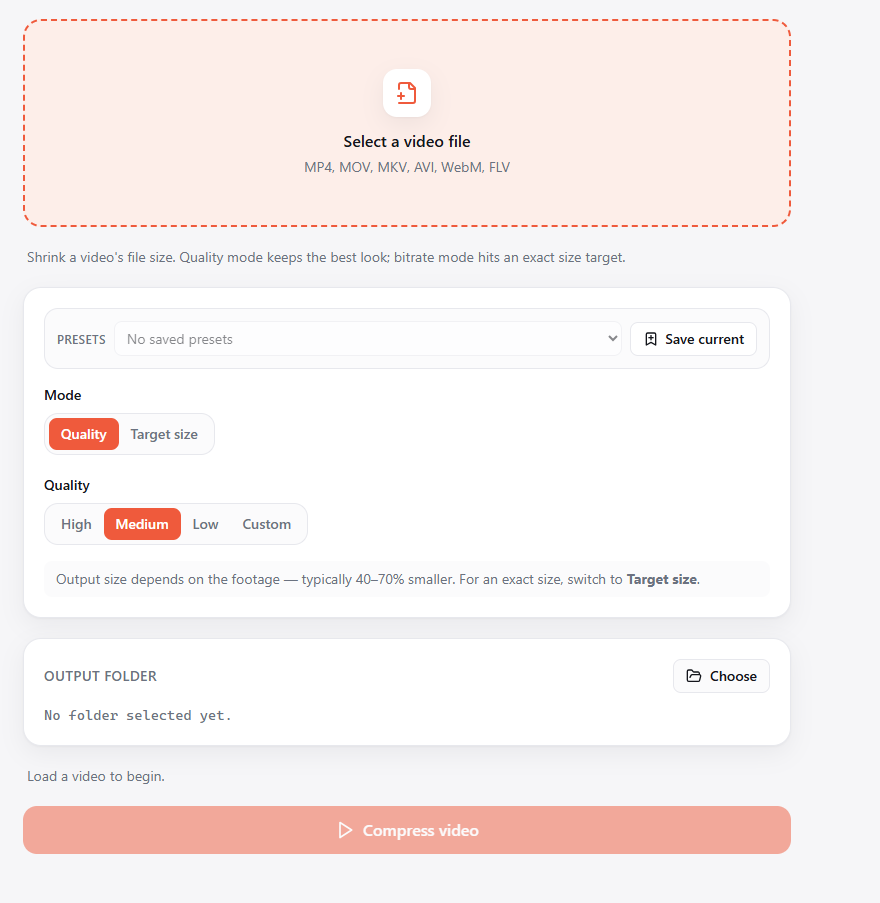
For "shrink it but keep it looking good," High or Medium is what you want. If you're not sure, start at Medium and compare the result to the original — you almost certainly won't see a difference, and the file will be a fraction of the size.
Step 4 — Pick an output folder and compress
Click Choose next to Output folder to set where the compressed file lands (you set this once and every tool reuses it). Then hit Compress video. VideoForge re-encodes the clip locally and writes the smaller file to your folder, leaving the original untouched.
That's the whole free workflow: load, choose a quality, compress — entirely on your machine.
Need to hit an exact size? Use Target size mode
Sometimes the goal isn't "smaller," it's "under 25 MB" for an email, or whatever a specific platform allows. Switch Mode to Target size and you get a bitrate slider with a live estimate of the final file size. Nudge the slider until the estimate sits comfortably under your limit, then compress. It's the reliable way to guarantee the file fits the first time, instead of compressing, checking, and trying again.
A few tips for keeping quality high
- Start at High or Medium and only go lower if you still need a smaller file.
- Keep the original — VideoForge writes a new file, so you can always re-compress at a different setting.
- If a file is still too big at High, the footage may just be long or high-resolution; Target size mode lets you trade a precise amount of bitrate for the exact size you need.
What else VideoForge does for free
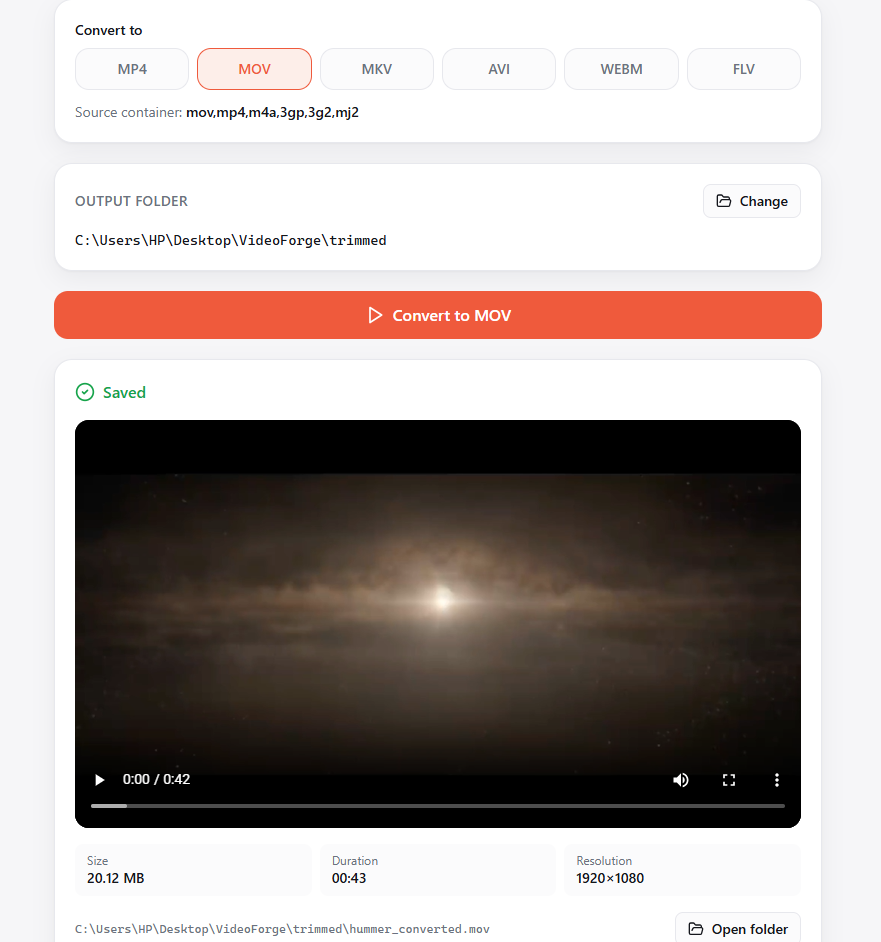
Compression is one of four free tools:
- Convert — change format between MP4, MOV, MKV, AVI, WebM and FLV
- Trim — cut a clip down, with a lossless (instant) or precise (re-encoded) option
- Video to GIF — turn a short clip into a shareable GIF
Why doing it offline matters
Online compressors send your entire video to a server to process it. For a quick meme that may be fine — but for client footage, anything personal, or simply a large file you don't want to wait to upload twice (once to them, once back), "upload and trust" isn't ideal. Because VideoForge runs the encoder directly on your PC:
- Your video never leaves your computer
- There's no file-size cap, queue or watermark
- It keeps working with no internet connection
Free vs Premium at a glance
| Free | Premium (one-time, $14.99) | |
|---|---|---|
| Compress (Quality + Target size) | ✓ | ✓ |
| Convert, Trim, Video→GIF | ✓ | ✓ |
| Batch compress / convert (whole folders) | — | ✓ |
| Resolution & aspect presets (4K/1080p/720p, 9:16, 1:1) | — | ✓ |
| Watermark, speed control, subtitle burn | — | ✓ |
| Merge, split, frame & audio extraction | — | ✓ |
| Saved presets & job history | — | ✓ |
VideoForge is free to download and use for compressing, converting, trimming and GIFs. Premium is a one-time purchase — no subscription — that unlocks batch processing, resolution presets, watermarking and the rest of the toolkit.
Ready to shrink that file?
You can compress your first video in about a minute — free, offline, and without trading away quality.